iOS - Core Module
The Core Module is the fundamental infrastructure on which all modules of the EnQualify SDK are built. Each of the OCR, NFC, Face, VideoCall, and Utility modules depends on the Core Module — thus, Core must be correctly configured before moving to any module.
What is described on this page applies to all modules. Only module-specific differences will be addressed on the module pages.
Adding the SDK to the Project
EnQualify iOS SDK can be integrated directly into the project:
- Method: Add the SDK directly to the project by embedding it as an xcframework and loading the necessary dependencies through cocoapods.
// target 'MySampleProject' do
  use_frameworks!
  pod 'TensorFlowLiteSwift' # For identity detection
  pod 'TensorFlowLiteSwift/Metal' # For identity detection
  pod 'OpenSSL-Universal','3.3.2000' # CoreModule
  pod 'GoogleWebRTC' # For Video Call
  pod 'Socket.IO-Client-Swift' # For Video Call
  pod 'GoogleMLKit/FaceDetection', '7.0.0' # For Face and Liveness Detection
end


post_install do |installer|
   installer.pods_project.targets.each do |target|
    target.build_configurations.each do |config|
        config.build_settings['BUILD_LIBRARY_FOR_DISTRIBUTION'] = 'YES'
        config.build_settings['EXPANDED_CODE_SIGN_IDENTITY'] = ""
        config.build_settings['CODE_SIGNING_REQUIRED'] = "NO"
        config.build_settings['CODE_SIGNING_ALLOWED'] = "NO"
        config.build_settings["EXCLUDED_ARCHS[sdk=iphonesimulator*]"] = ""
        config.build_settings['VALID_ARCHS'] = "arm64 x86_64"
        config.build_settings['IPHONEOS_DEPLOYMENT_TARGET'] = '15.5'
        config.build_settings["ONLY_ACTIVE_ARCH"] = "YES"
    end
  end
end
Explanation of Post-Installation Build Settings
BUILD_LIBRARY_FOR_DISTRIBUTION = YES:
Ensures that the framework is compiled in an optimized way for distribution. This facilitates its use as a binary or shared framework in other projects. This setting is particularly important when creating an XCFramework.
EXPANDED_CODE_SIGN_IDENTITY = "":
Clears the Code Signing Identity to ensure that no specific certificate is used during the build process.
CODE_SIGNING_REQUIRED = NO:
Disables the code signing requirement during the build process. This is useful in situations where signing is not necessary, such as during testing.
CODE_SIGNING_ALLOWED = NO:
Ensures that code signing is completely disabled.
EXCLUDED_ARCHS[sdk=iphonesimulator*] = "":
Removes all previously excluded architectures for the iPhone simulator. This setting ensures compatibility during the build process.
VALID_ARCHS = "arm64 x86_64":
Specifies the valid architectures for the build. Here, arm64 (M Series) is used for Mac with Apple Silicon and x86_64 for Intel processor Macs.
IPHONEOS_DEPLOYMENT_TARGET = 14.0:
Sets the minimum iOS version the application or framework supports. This ensures compatibility with devices running iOS 14.0 and above.
ONLY_ACTIVE_ARCH = YES:
Limits the build process to only the active architecture of the device/simulator. This increases efficiency by shortening build times during the development phase.
Editing the PodFile
#PodFile Example
source 'ssh://git@github.com/EnquraTechnology/EnQualifyiOSPackages.git'
source 'https://github.com/CocoaPods/Specs.git'

platform :ios, '15.5'
use_frameworks!

target 'YourApp' do
  pod 'EnQualify/OCR', '2.0.0.1'
  pod 'EnQualify/NFC', '2.0.0.1'
  pod 'EnQualify/Face', '2.0.0.1'
  pod 'EnQualify/VideoCall', '2.0.0.1'
  # Other modules can be added.
end
 atlassian-warning#FFEBE6
pod 'EnQualify/OCR', '2.0.0.1-s' -s the suffix indicates that the related version is static linkage and may need to be used depending on your project setup. Not necessary for native developments unless stated otherwise, -s versions are expected not to be loaded.
XCFrameworks
- To integrate the EnQualify SDK directly into your project, you can add the core SDK files such as
OCRModule.xcframework,NFCModule.xcframework,FaceModule.xcframework,CoreModule.xcframework, andVideoCallModule.xcframeworkdirectly to your project files. - Alternatively, if you have already copied the XCFrameworks into your project, you can add these frameworks to your project by navigating to Project Settings > General and choosing the Embed and Sign option.
- For the dependencies of the EnQualify SDK added in this way, you need to include the version numbers specified in the "podspec" file or provided by the supplier.
The EnQualify iOS SDK can be added to the project via CocoaPods or Swift Package Manager (SPM).
Installing EnQualify iOS SDK with CocoaPods
Method: To use the relevant module of the EnQualifyPlus SDK, the pod name must be written along with the source change in your pod file.
EnQualifyPlusSDK can be distributed as a private repo via cocoapods, for private repo access, the RSA key must be provided and this key should be added to known hosts.
// Creating an RSA key with SSH Keygen
ssh-keygen -t rsa -b 4096 -C "your_email@example.com"
"your_email@example.com" will be the email address you need to use to access the git repository.
During the process of generating the RSA key, you'll be prompted for a passphrase for easier entry during commonly performed operations, and your operations will subsequently occur with this passphrase, so it should be something memorable and personal.
To add the created RSA key to known hosts, the related script is executed.
The script that will be run to copy the created RSA key is as follows.
The structure you should see at this point is as follows.
// RSA KEY SAMPLE
ssh-rsa AAAAMIICXAIBAAKBgQCGwZBAR3F1vaJCdXdE15/n5TApKcGR3qBCTJCrPNIDO+qyhs4z
rZmxbTfNwOp8w8qXwt/daZ/JatByFoW02A+4+dvgUPuKWvs3Z9Ts9xH70Qw4mT8z
joMKcLcIViTD4m4yLQnjncP+HYp8LPL+mbUtLEemyobJsVOVJKmUYcovLQIDAQAB
AoGAeQVTMHc5DV2+YGMwNvJTWKa7BuzKO9+tG325mx+nGGJyF9z7SOwKkI6exDkS
HfSUeJD6DdXzO6ejBiL194DnNIRy+tZVIxUhNlL67rw+H8WoEqzzCLTrglakDes/
BAy2vQtdBOuxNXmudROQVAM/mjDSbMRaF+HA/+ytF3nb4b0CQQD23u18NwT69lGM
YMHuWC1FPu5q5UBXSqUDDCQxELnyxwxx2TbpDld45qPzQbYWxcvLTQmwSco2icVu
2kdjUC3TAkEAi71FMCJHDc2Zs1h/Zqv75Swahw6Nczd6Mlws5wLGNfs3T8GvwrFW
/9vKDfTOn0l2JECn50D1mSKuqNkd== your_mail@example.com
By delivering this key to the relevant person, you will gain access to the private repo. The following script should be run to pull the EnQualifySDK from the private repo.
// Pod Repo Add enquratechnology
pod repo add enquratechnology-enqualifyiospackages ssh://git@github.com/EnquraTechnology/EnQualifyiOSPackages.git
With these procedures completed, the EnQualifyPlus SDK will now be available.
Installing EnQualify iOS SDK with Swift Package Manager (SPM)
To utilize the relevant module of the EnQualifyPlus SDK, SSH access to the private repository available on GitHub must be ensured.
The following steps outline the required SSH configuration to enable Xcode and SPM to access the private repository without issues.
First, check whether the .ssh folder exists on your system.
Start the SSH agent to manage SSH keys.
Create a new SSH key for GitHub access.
"your_email@example.com" will be the email address you need to use to access the git repository.
This key will be used for GitHub access by SPM and Xcode.
Add the created SSH key to macOS Keychain and SSH agent.
This process avoids prompting for a password during Xcode usage.
The public key is copied using the following command:
The SSH configuration for GitHub is defined as follows.
Host github.com
  HostName github.com
  User git
  IdentityFile ~/.ssh/id_github
  UseKeychain yes
  AddKeysToAgent yes
  IdentitiesOnly yes
This configuration ensures that the correct SSH key is used for GitHub connections.
To avoid any security warnings that may arise during the first connection, GitHub is added to the known_hosts list.
Test the connection to ensure the SSH configuration is working correctly.
Once these configurations are complete, Xcode and Swift Package Manager (SPM) will be able to access private repositories on GitHub seamlessly via SSH, allowing for a secure integration of the EnQualify iOS SDK into the project.
The 'ssh://git@github.com/EnquraTechnology/EnQualifyiOSPackages.git' in the source section is necessary for accessing the private repo.
EnQualify SDK and Simulator Support
Due to the use of camera tools, EnQualify SDK does not work on the simulator target but can be successfully compiled. To enable compilation, adjustments to the Other Linker Flags settings for the relevant targets are required.
Configuration Steps
-
Settings in Xcode:
-
Navigate to Project Target > Build Settings and find the OTHER_LDFLAGS section.
-
Under Debug and Release Schemes:
-
Select Any iOS Simulator SDK.
- Remove the $(inherited) flag.
- Click the "-" button to remove flags that prevent compilation for the simulator (e.g. -framework).
-
Alternative Manual Adjustment:
-
Right-click the
.xcodeprojfile in your project directory and select Show Package Contents. - Open the
.pbxprojfile with Xcode. - Search within the project files for the OTHER_LDFLAGS section and make the necessary adjustments directly.
NOTE: The OTHER_LDFLAGS section that needs to be changed should look like this:
The visual representation of changes made in Xcode is provided below.

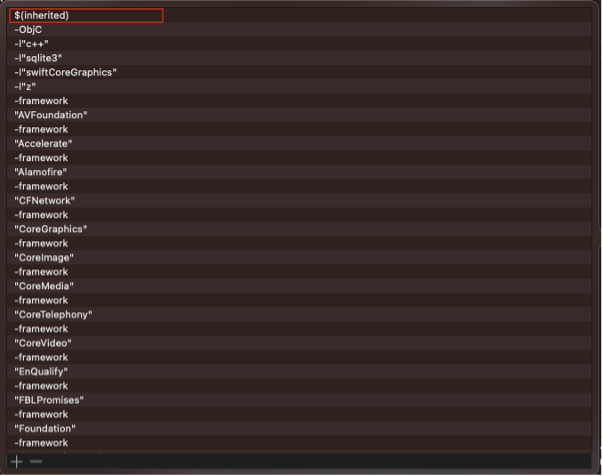
Flags to be Removed
The flags for the libraries listed below need to be removed:
- MLKitCommon
- MLKitVision
- MLKitFaceDetection
- MLImage
- TensorFlowLiteC
- WebRTC
Minimum Requirements
The EnQualify SDK is compiled with Xcode version 16.0, which Apple currently considers the minimum level required for compliance with standard processes. When there is an agreement on the stability of versions, interim updates will increase the Xcode version accordingly.
The EnQualify SDK establishes a minimum iOS support of 14.0. This means it can work with projects having a min iOS Deployment target of 14.0 and above.
The EnQualify SDK supports both Intel (x86_64) and (arm64) architecture-compatible simulator builds, and once the necessary settings are made, builds can be obtained and run without issues on both architectures.
Due to the use of cameras in the EnQualify SDK OCR, Face, and VideoCall flows; it cannot be used on the simulator due to the NFC feature being utilized in the NFC flow.
Configuration Settings for EnQualify SDK
Adding Near Field Communication (NFC) and SignIn Capabilities to the Project
To add Near Field Communication (NFC) support to your project, follow the steps below:
Opening the Project in Xcode
- Open your project in Xcode.
- Click on your project name in the Project Navigator to go to the project target settings.
-
Switch to the Signing & Capabilities tab:
-
Click the + Capability button in this tab.
Adding NFC Support to the Project
- Type "Near Field Communication" or "NFC" into the opened search bar.
- Select the Near Field Communication Tag Reading capability from the list.
This action will add NFC support to the project.
If You Don't See the NFC Option
If you don't see the NFC option in Xcode, this may be due to missing configurations or the version of Xcode. In this case:
-
Visit Apple Developer Documentation:
-
Go to the Apple Developer website.
-
Search for NFC Documentation:
-
Look for information about NFC or Near Field Communication capabilities. This will guide you on how to enable and configure NFC in your project.
-
Manually Enable NFC:
-
If necessary, manually enable NFC in your application's Info.plist file and other required configurations by following the steps in the Apple Developer documentation.
Configuring the Info.plist File
According to Apple’s privacy policies, you need to add usage descriptions for camera, microphone, and NFC scanning features to your Info.plist file. These descriptions will be shown to the user when the application requests access to these resources.
Camera Usage Description
To request access to the device's camera, add the following key to your Info.plist file:
<key>NSCameraUsageDescription</key>
<string>Access to your camera is required to scan QR codes and conduct real-time video processing.</string>
Modify the description to specify why your application needs access to the camera.
Microphone Usage Description
To request access to the device's microphone, add the following key to your Info.plist file:
<key>NSMicrophoneUsageDescription</key>
<string>Access to your microphone is required for audio recording during video calls and interactions.</string>
Modify the description to specify why your application needs access to the microphone.
NFC Scanning Usage Description
To request access to NFC features, add the following key to your Info.plist file:
<key>NFCReaderUsageDescription</key>
<string>We need access to NFC to scan NFC tags and smoothly interact with NFC-enabled devices.</string>
Modify the description to specify why your application needs access to NFC scanning.
Adding NFC TagReaderSession
To read a contactless NFC chip, the relevant content and value conforming to the ISO 7816 Standard must be added to the info.plist file.
 <key>com.apple.developer.nfc.readersession.iso7816.select-identifiers</key>
    <array>
        <string>A0000002471001</string>
    </array>
Adding These Entries in Xcode
- Open your project in Xcode.
- Open the Info.plist file from the Project Navigator.
- Right-click in an empty area of the list and select Add Row.
- Add the specified keys (NSCameraUsageDescription, NSMicrophoneUsageDescription, and NFCReaderUsageDescription) with the appropriate descriptions.
These descriptions are necessary to clearly communicate to users why your application requests access to these resources.
Purpose of the .entitlements File After Adding NFC
When you add NFC capabilities to your project, Xcode automatically creates an .entitlements file. This file contains the necessary authorization settings for the application to use certain features, such as NFC access, push notifications, and iCloud.
Function of the .entitlements File
The .entitlements file ensures that the application has the necessary permissions to access system resources. This file includes permission to use the NFC features provided by iOS.
The .entitlements file for NFC will include the following entry:
<key>com.apple.developer.nfc.readersession.formats</key>
<array>
    <string>Tag</string>
    <string>ISO7816</string>
    <string>FeliCa</string>
</array>
This entry specifies the formats your application can use for NFC tag scanning.
What Happens If the .entitlements File Is Missing?
- If the .entitlements file is missing or incorrectly configured, NFC functionality will not work as expected.
- The application may not be able to request NFC permissions or could have its access to NFC blocked by the system; this can lead to errors or crashes.
Manually Adding the .entitlements File
If Xcode does not automatically create the .entitlements file, or if you need to configure it manually, follow these steps:
-
Create a New .entitlements File:
-
Right-click on the Project Navigator in Xcode and select New File.
- Under Resource, choose Property List.
- Name the file
YourProjectName.entitlements(replace the "YourProjectName" part with the name of your project).
<key>com.apple.developer.nfc.readersession.formats</key>
<array>
    <string>Tag</string>
    <string>ISO7816</string>
    <string>FeliCa</string>
</array>
-
Add NFC Requirement to the .entitlements File:
-
Open the newly created .entitlements file.
- Add the following entry to enable NFC functionality:
-
Link the .entitlements File to Your Project:
-
Select your project in the Project Navigator.
- Under Signing & Capabilities, ensure that the NFC capability is added.
- If it is not added, click the + Capability button and add the Near Field Communication Tag Reading capability.
-
In the Signing & Capabilities section, check that your .entitlements file is correctly selected in the Entitlements File setting under Code Signing.
-
Build the Project:
After adding the .entitlements file to the project, rebuilding the project will give your app the NFC reading feature.
SSL Certificate and Implementation
EnQualify SDK Security System
The EnQualify SDK features a two-step security system.
- First Step: An SSL certificate is used to protect against man-in-the-middle attacks.
- Second Step: An end-to-end encrypted networking method is applied, detailed later in the document under Message Signature.
In its existing system, the EnQualify SDK communicates with the verification platform to send information obtained during authentication and to retrieve calibration and configuration data necessary for the SDK.
It also communicates with the Core SDK Signaling.
For both systems, it is possible to disable the SSL service if necessary.
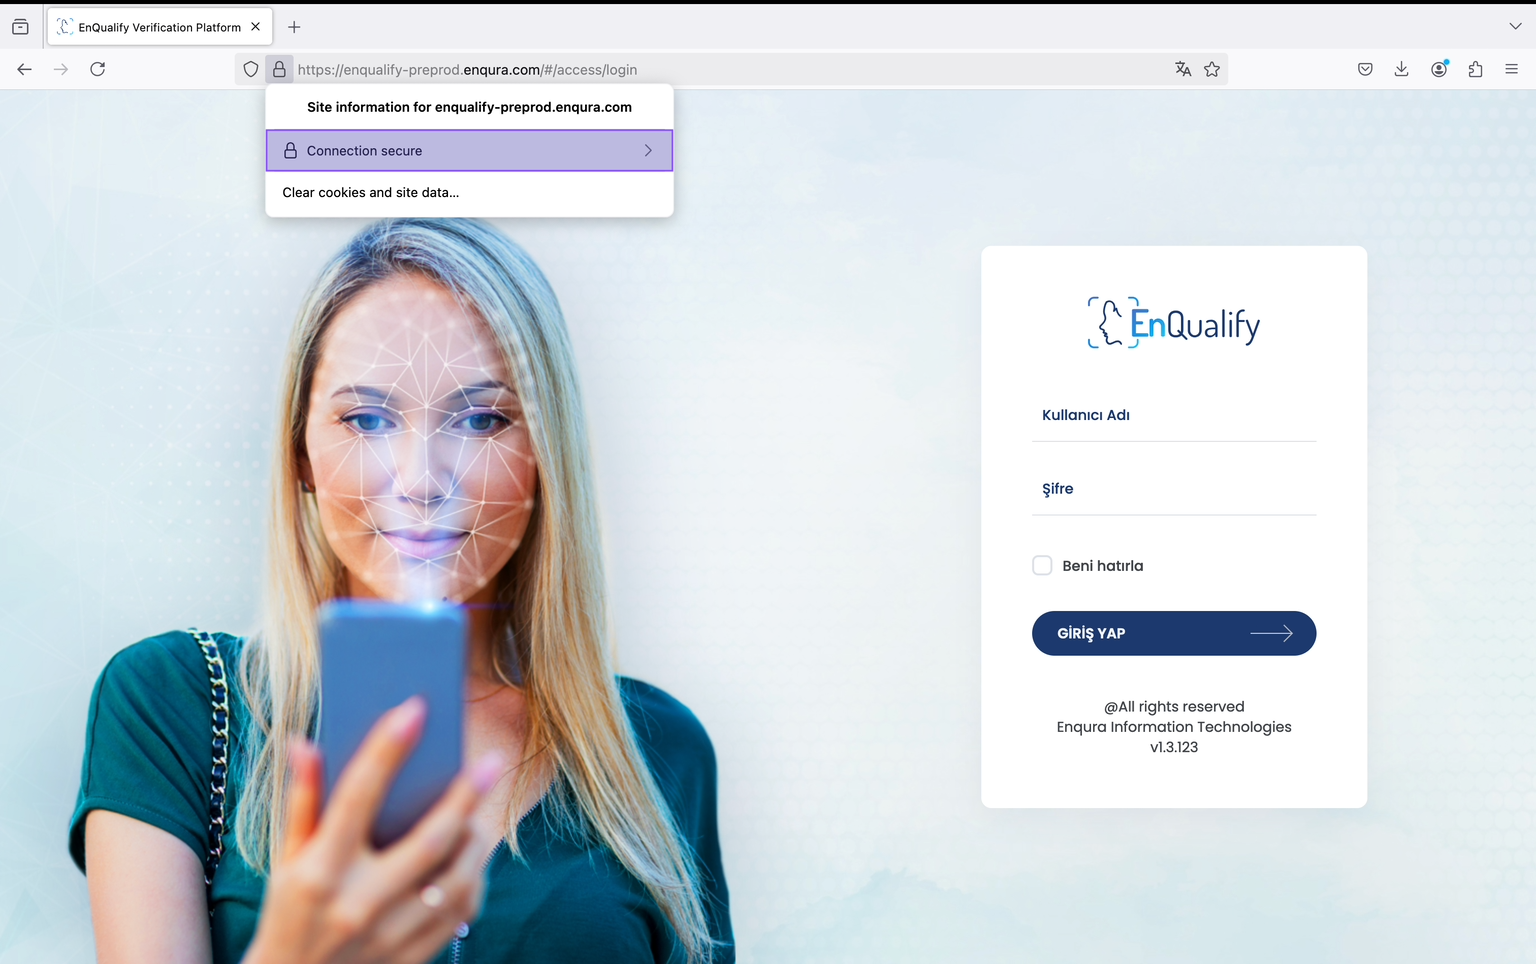
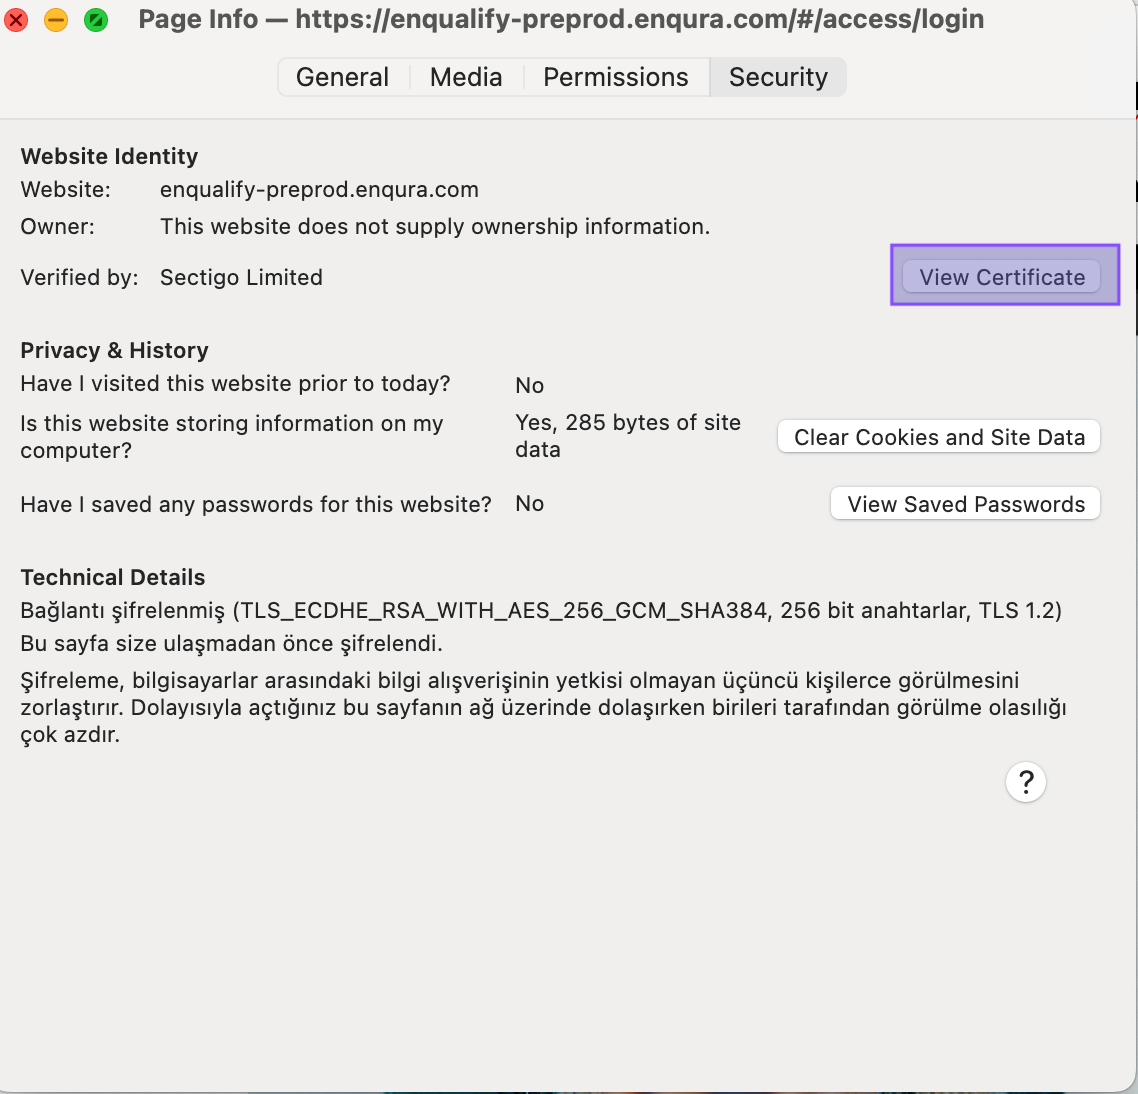
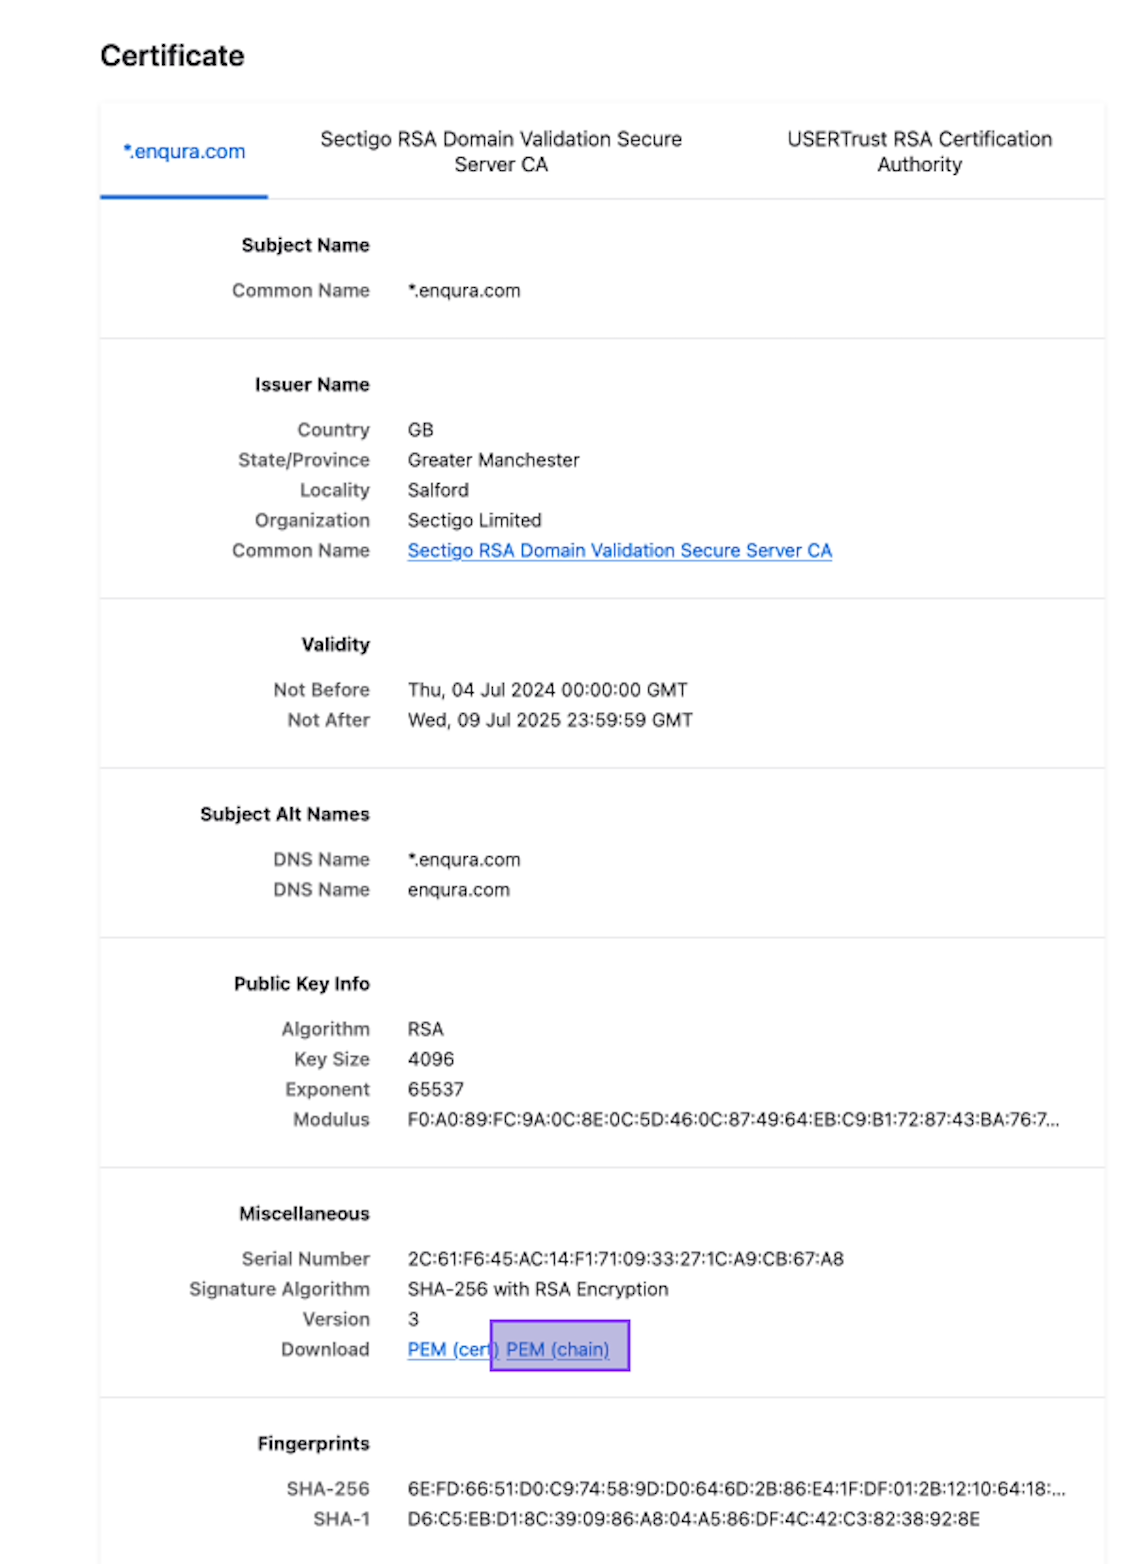
You can use the following script in the terminal to convert the certificate. While "_.enqualify.io.pem" represents the name of the existing .pem certificate, "enqura.der" specifies the name of the .der certificate that will be created.
Certificate Converter
A macOS application that converts SSL certificates from PEM format to DER format.
Certificate Converter is a user-friendly macOS application that converts SSL certificates from PEM (Privacy-Enhanced Mail) format to DER (Distinguished Encoding Rules) format. The application features both automatic certificate downloading from websites and converting existing PEM files.
Dual Input Method: The Certificate Converter application offers users two different methods to obtain a certificate. This approach addresses various usage scenarios and user needs.
- Method 1: Downloading from URL

- Method 2: File Selection

Output Settings
The user can rename the DER file to a predefined name.

Export Process - File Saving Procedure
After the conversion process is completed, upon clicking the "🚀 Create DER File" button, a file saving window opens. In this window, the user selects the location where the DER file will be saved and can make final edits to the predefined file name. When the "Save" button is pressed, the system converts PEM to DER format in the background and saves it to the selected location. Upon successful completion, a confirmation message "✅ DER file successfully created" will be displayed.
Adding the Certificate to Xcode
To add the generated .der certificate to Xcode:
- Open your project in Xcode.
- Drag and drop the .der certificate file into your project navigator.
- In the opened dialog, ensure that the appropriate Targets are selected for the certificate to be included in the correct build configurations.
- Verify that the certificate appears under Build Phases > Copy Bundle Resources for the selected targets.
Selecting the correct targets is important to ensure the certificate is accessible at runtime for the desired modules.
SSL Certificate Validation Process
The EnQualify SDK accesses the SSL certificate used for communication with the verification platform by searching across the entire project package. The certificate is accepted if it is valid for the domain and has not expired, allowing the process to continue. However, if an invalid certificate is provided, you will see relevant errors, such as ResponseValidation errors in the Xcode logs.
Multiple Certificate Support
The EnQualify Core SDK is designed to work with multiple certificates. To add multiple SSL certificates, you can fill the relevant fields in the baseModel parameter of the setBaseModel() function accessed from the EnQualify modules, which will be detailed later. Currently, certificate support is available in both base64string and file format.
- The name of the created certificate must match the name given in the setBaseModel function; otherwise, an error will occur.
- If you want to disable SSL pinning when accessing signaling and backend environments, leaving the relevant parameters empty will suffice.
atlassian-warning#FFEBE6
It is strongly recommended not to disable SSL Pinning for customer applications that will be involved in live processes; otherwise, security vulnerabilities will arise.
Message Signature
The EnQualify SDK utilizes a secure, end-to-end encrypted structure when transmitting the information it obtains to the verification platform. EnQualify SDK generates a temporary RSA key and uses this RSA key to encrypt the public RSA key generated on the backend. Then, it returns the public key of the RSA key in an encrypted form to the EnQualify SDK. The EnQualify SDK then decrypts this public key. It signs the requests it will send to the verification platform with this key. The EnQualify SDK does not contain any hardcoded keys. This RSA key is regenerated for each session and sent to the EnQualify SDK in encrypted form.
Models
BaseModel
BaseModel is the data model containing the certificate information and the server connection address used during verification processes. Signaling (Communication) and MAPI (Mobile Application Programming Interface) certificates are stored in both file (.der) format and Base64 text format.
Model
@objc public class CoreBaseModel: NSObject {
    public var signallingCertificateList: [String]?
    public var mapiCertificateList: [String]?
    public var signallingCertificateBase64List: [String]?
    public var mapiCertificateBase64List: [String]?
    public var signallingCertificatePublicKeyList: [String]?
    public var mapiCertificatePublicKeyList: [String]?
    public var baseURL: String?
    public var locale: String?
    public var mobileUser: String?
    public var countryCode: String?
    public var useEmbeddedLocalSound: NSNumber?
}
Properties
| Property | Type | Description |
|---|---|---|
signallingCertificateList | [String]? | Array of signaling certificates. Certificates are stored in file format (.der). |
mapiCertificateList | [String]? | Array of MAPI certificates. Certificates are stored in file format (.der). |
signallingCertificateBase64List | [String]? | Encoded forms of signaling certificates in Base64String format. |
mapiCertificateBase64List | [String]? | Encoded forms of MAPI certificates in Base64String format. |
signallingCertificatePublicKeyList | [String]? | List of public keys of signaling certificates |
mapiCertificatePublicKeyList | [String]? | List of public keys of MAPI certificates |
*baseURL | String | The base server address used for API access. |
locale | String? | Indicates the language for voice guidance messages. |
mobileUser | String? | Indicates the anonymous user information used for authorization. |
countryCode | String? | Used to ensure that necessary data is obtained for verification specific to a region or area. |
useEmbeddedLocalSound | NSNumber? | Ensures that embedded sound files are given priority if available. |
Usage Example
In the following example, a BaseModel object is created with the certificate information and server address defined:
let baseModel = CoreBaseModel(
  signallingCertificateList: ["enqura"],
  mapiCertificateList: ["enqura"],
  aiCertificateBase64List: nil, // Base64String can be added
  signallingCertificateBase64List: nil, // Base64String can be added
  signallingCertificatePublicKeyList: nil,
  mapiCertificatePublicKeyList: nil,
  baseURL: "https://yourcompanymapi.enqura.com",
  locale: "TR",
  mobileUser: "mobile",
  countryCode: "TUR",
  useEmbeddedLocalSound: 1 // Use embedded sound files
)
Sound Files Management
The SDK comes by default with embedded sound files.
Each sound file has a hash value that is used to check whether the sound file is up-to-date.
useEmbeddedLocalSound Parameter
The useEmbeddedLocalSound parameter in the BaseModel indicates which source the SDK will use for sound files.
useEmbeddedLocalSound = false
In this case, the SDK checks for remote updates.
When the SDK is initialized:
- The SDK sends the hash list of sound files found on the device to the BackOffice service.
- The BackOffice checks the existing hash values to determine if there is an updated sound file.
-
If there is an updated sound file:
-
The relevant sound file is downloaded from the server.
- The old sound file on the device is automatically updated.
This allows sound files to be managed remotely without requiring an application update.
useEmbeddedLocalSound = true
In this case, the SDK does not make any requests to the remote server and only uses the embedded sound files that come with the application.
No updates or downloads are performed.
Local Override (Custom Sound Usage)
If the application developer wishes to replace the default sounds that come with the SDK with their own sound files, they can override by adding the respective sound files to the application bundle.
To do this, sound files must be added with the exact same names listed below to the application bundle.
The SDK automatically detects these files and uses the sounds in the bundle instead of the default sounds.
- snd_start_eye_close
- snd_end_eye_close
- snd_start_face
- snd_liveness_timeout
- snd_start_face_left
- snd_face_fail
- snd_start_face_right
- snd_start_face_up
- snd_end_liveness
- snd_end_chip
- snd_start_chip_front
- snd_detect_chip
- snd_chip_timeout
- snd_chip_fail
- snd_start_smile
- snd_end_smile
- snd_id_read_timeout
- snd_id_type_check_timeout
- snd_start_id_back
- snd_cross_check_fail
- snd_end_id_read
- snd_start_holo
- snd_start_id_front
- snd_end_id_front
- snd_start_type_check_front
- snd_start_type_check_back
- snd_liveness_completed
- snd_waiting_agent
- snd_ready_to_start_id
- snd_ready_to_start_chip
SessionModel
SessionModel is the data model containing user and identity information during a call session. It includes call type, user details, credentials, and additional parameters related to the session.
Model Definition
@objc public class CoresSessionModel {
    var callType: String             // Required field
    var userName: String? = nil
    var surname: String? = nil
    var phone: String? = nil
    var email: String? = nil
    var identityType: String? = nil
    var identityNo: String? = nil
    var reference: String             // Required field
    var canAutoClose: Bool = false    // Default: false
    var _continue: Bool = false      // Default: false
    var category: String? = nil
    var taxNumber: String? = nil
    var businessReference: String? = nil
    var handicapped: Bool? = false
}
Properties
| Property | Type | Description |
|---|---|---|
*callType | String | Required. Parameter indicating the call type (e.g.: "NewCustomer"). |
userName | String? | User's first name. Can be nil. |
surname | String? | User's last name. Can be nil. |
phone | String? | User's phone number. Can be nil. |
email | String? | User's email address. Can be nil. |
identityType | String? | Type of identity (e.g.: "I" (National ID), "P" (Passport)). Can be nil. |
identityNo | String? | User's identity number. Can be nil. |
*reference | String | Required. Reference ID for the session. |
canAutoClose | Boolean | Indicates whether the session can auto-close. Default: false. |
_continue | Boolean | Indicates whether the session should continue or not. Default: false. (Note: continue has been renamed to isContinue in Kotlin due to being a keyword.) |
category | String? | Category of the session. Can be nil. |
taxNumber | String? | User's tax number. Can be nil. |
businessReference | String? | Reference information related to the business. Can be nil. |
handicapped | Boolean? | Flag indicating whether the user is disabled. Default: false. |
Usage Example
In the following example, a SessionModel object is created with the session details defined:
var session = CoreSessionModel(
    callType = "NewCustomer",
    userName = "Enqura",
    surname = "Information",
    phone = "+905551234567",
    email = "enqualifyplus@enqura.com",
    identityType = "TC. Kimlik Kartı",
    identityNo = "12345678901",
    reference = "REF123456",
    canAutoClose = true,
    _continue = true,
    category = "category",
    taxNumber = "9876543210",
    businessReference = "COMPANY",
    handicapped = false
)
Customization of UI Components
Working Logic
UI parameters defined via the BackOffice are retrieved via API upon application startup or the initiation of the relevant flow.
These parameters are parsed into the VerifyMobileFlexibleLayoutModel structure, dynamically updating the user interface components.
For example:
- The
fontColorfield → Changes the text colors. ocrFrameDefaultImage→ Sets the default visual for the OCR frame.faceProgressLayerColor→ Controls the color of the progress ring during the face recognition process.faceFailImage→ Defines the custom visual to be shown when recognition fails.
| Category | Description | Example Parameter(s) |
|---|---|---|
| Font | Determines font and size settings across the application. | font, fontColor |
| OCR Images | Defines the frame and status visuals used in authentication (OCR) screens. | ocrFrameSuccessImage, ocrFrameFailImage, ocrFrameDefaultImage, ocrFrameRotateImage, ocrFrameBackValidImage, ocrFrameBackInvalidImage, ocrFrameFrontValidImage, ocrFrameFrontInvalidImage |
| Face Recognition Images | Visuals used for guidance and status during face verification steps. | faceLeftImage, faceRightImage, faceUpImage, faceCompletedImage, faceFailImage |
| Face Recognition Progress Layer | Customizes the appearance of the circular progress ring during face recognition. | faceProgressLayerColor, faceProgressLayerStroke |